
Your Guide To CPAP Machine Cleaning Instructions

Keeping your CPAP machine clean is one of the most [...]
Keeping your CPAP machine clean is one of the most important things you can do to make your sleep apnea therapy work for you. It’s a simple habit, but it has a huge impact on your health and comfort.
The routine is straightforward: a quick daily wipe-down of your mask, tube, and humidifier, followed by a deeper weekly wash using mild soap and warm water. This small investment of time is critical. It's the best way to prevent germs from building up and ensure every part of your equipment works exactly as it should.
Why Consistent CPAP Cleaning Is So Important
Think about the environment inside your CPAP circuit for a moment. The air is warm and moist—perfect for helping you breathe comfortably all night. Unfortunately, that's also the ideal breeding ground for bacteria, mold, and mildew.
If you skip your cleaning routine, you’re essentially inviting these unwanted guests to set up camp in your mask, tubing, and water chamber. This isn't just about appearances; it's a serious matter for your respiratory health. Inhaling those microorganisms night after night can lead to sinus infections, allergic reactions, or other lung issues. A consistent cleaning schedule stops them in their tracks.
A Small Task With A Big Impact
It’s easy to see maintenance as just another chore, but it’s truly a cornerstone of successful therapy. A clean machine simply works better and feels better.
- Better Therapy: Over time, oils from your skin can build up on the mask cushion. This causes the silicone to degrade, leading to air leaks that prevent you from getting the full, prescribed pressure. A quick daily wipe maintains that crucial seal.
- Longer Equipment Life: Regular cleaning keeps hard water minerals from crusting up your humidifier tank and prevents the materials in your gear from breaking down too soon. You’ll find your equipment lasts much longer.
- More Comfort: Let's be honest—a fresh, clean mask just feels better. You also eliminate any stale or musty odors that can develop, making your therapy experience much more pleasant.
A clean CPAP is a healthy CPAP. By dedicating just a few minutes each day and about 20 minutes each week, you are actively protecting your health and maximizing the benefits of your sleep apnea treatment.
This guide will walk you through clear, practical cpap machine cleaning instructions for every component—the mask, the tubing, and the humidifier. Once you get this simple routine down, it makes a world of difference for your well-being and helps your device last.
For more helpful articles on maintaining your home medical equipment, feel free to explore our other blog posts. Every step you take to keep your gear clean is a direct investment in better, safer sleep.
Your Simple Daily and Weekly Cleaning Routine
Let's be honest, cleaning your CPAP can feel like a chore. The secret is to break it down into a simple, repeatable schedule. Instead of one overwhelming task, think of it as a few small, manageable steps. Just a couple of minutes each day and a slightly deeper clean once a week is all you need to keep your gear hygienic, comfortable, and working properly.
This rhythm prevents the buildup of skin oils, dust, and germs, which not only protects the lifespan of your equipment but also makes your therapy much more pleasant. Let's walk through what this looks like day-to-day.
The Quick Daily Refresh
This part of your routine should take less than five minutes and focuses on the components that come into direct contact with you and the water in the humidifier. It’s your best defense against contaminants.
- Mask Cushion: Every morning after you take your mask off, give the cushion a quick wipe. You can use a damp cloth with a tiny drop of mild soap or a dedicated CPAP wipe. This simple step removes the facial oils and dead skin cells that can break down the silicone and cause air leaks.
- Humidifier Chamber: Dump out any water left over from the night before. Give the chamber a good rinse with warm, distilled water and set it somewhere to air dry, but keep it out of direct sunlight. A crucial rule of thumb: never reuse water.
Your Weekly Deep Clean
Once a week, carve out about 20-30 minutes to give your equipment a more thorough bath. This is where you’ll tackle any buildup that the daily wipe-downs might have missed.
First, unplug your machine. Take your mask apart—it usually has three main pieces: the cushion, the frame, and the headgear. Then, disconnect the tubing from both the mask and the machine. You'll be washing all of these parts, though the headgear often only needs a wash every couple of weeks unless it’s looking a bit grimy.
Next, fill a sink or a clean basin with warm water and a small squirt of mild, unscented soap. Basic liquid dish soap works perfectly. Submerge the mask parts and the tubing, swishing them around to loosen any gunk. Let everything soak for about 15-20 minutes.
Pro Tip: A dedicated soft-bristle CPAP brush is a fantastic tool for getting into the nooks and crannies of your mask or cleaning the inside of the tubing. It helps dislodge stubborn residue without scratching any of the parts.
After the soak, rinse every single piece under warm running water until there's no soap left. Then, lay everything out on a clean towel to air dry completely. For the tubing, a great trick is to hang it over your shower rod or a doorknob so any trapped water can drip out from both ends.
This simple routine is the core of good CPAP hygiene, as this chart illustrates.
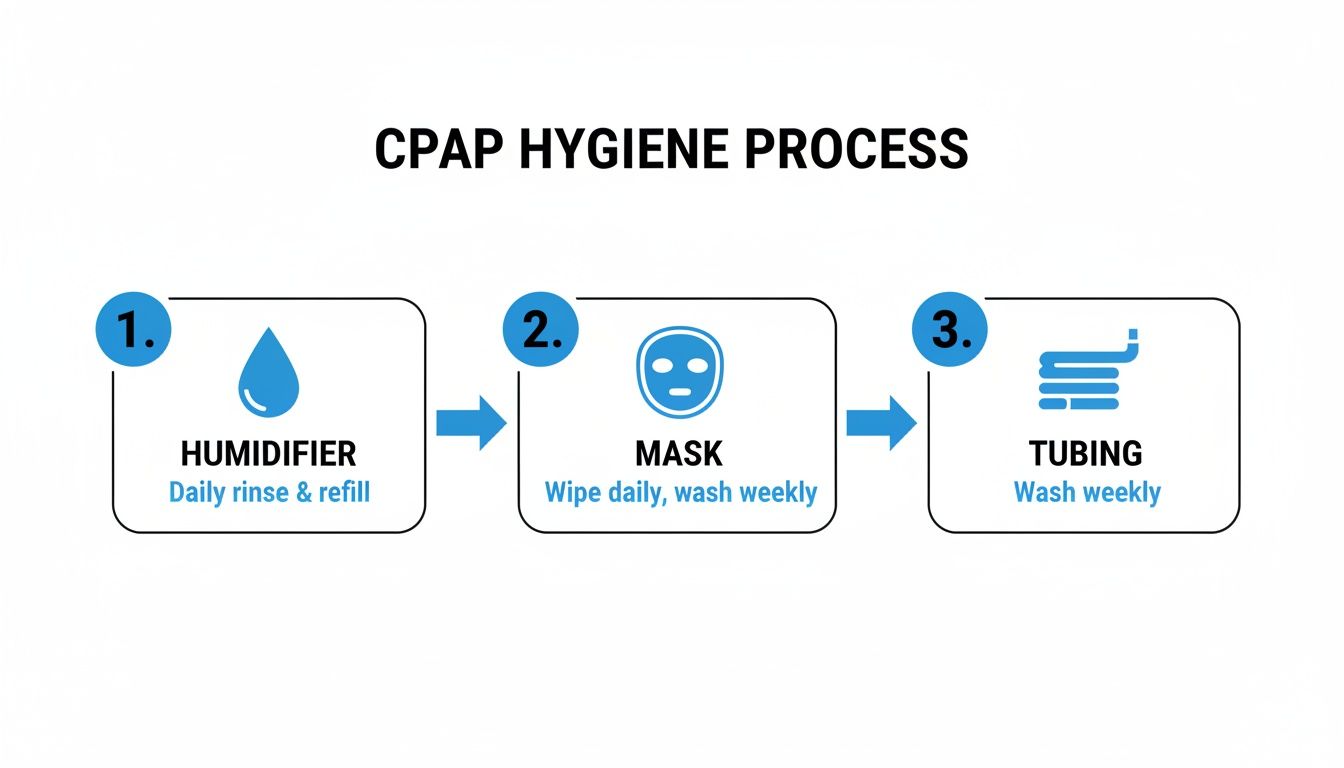
The image really drives home the point: consistent, daily and weekly attention to the humidifier, mask, and tubing is what keeps your therapy safe and effective.
With over 900 million people affected by sleep apnea globally, the need for clear, straightforward cleaning solutions has never been greater. This demand has even pushed the market for CPAP cleaning devices to an estimated USD 192.11 million in 2024. But no matter what new gadgets come out, the fundamental instructions remain the same: take apart your mask and tubing, wash them with mild soap, and steer clear of harsh chemicals like bleach. This is the best way to eliminate pathogens that can thrive in that warm, humid environment.
By sticking to this routine, you’re not just cleaning your equipment—you’re investing in your health. If you have more questions about maintaining your gear, you can always find answers on our Affinity Home Medical Equipment FAQ page.
Getting to Know Your CPAP: A Part-by-Part Cleaning Guide
Every piece of your CPAP setup plays a unique role in your therapy, and because of that, each one needs a slightly different approach when it comes to cleaning. Think of it like maintaining a car; you don't use the same tools for the engine as you do for the upholstery. Getting the details right for each component is what makes for a truly clean and effective system.
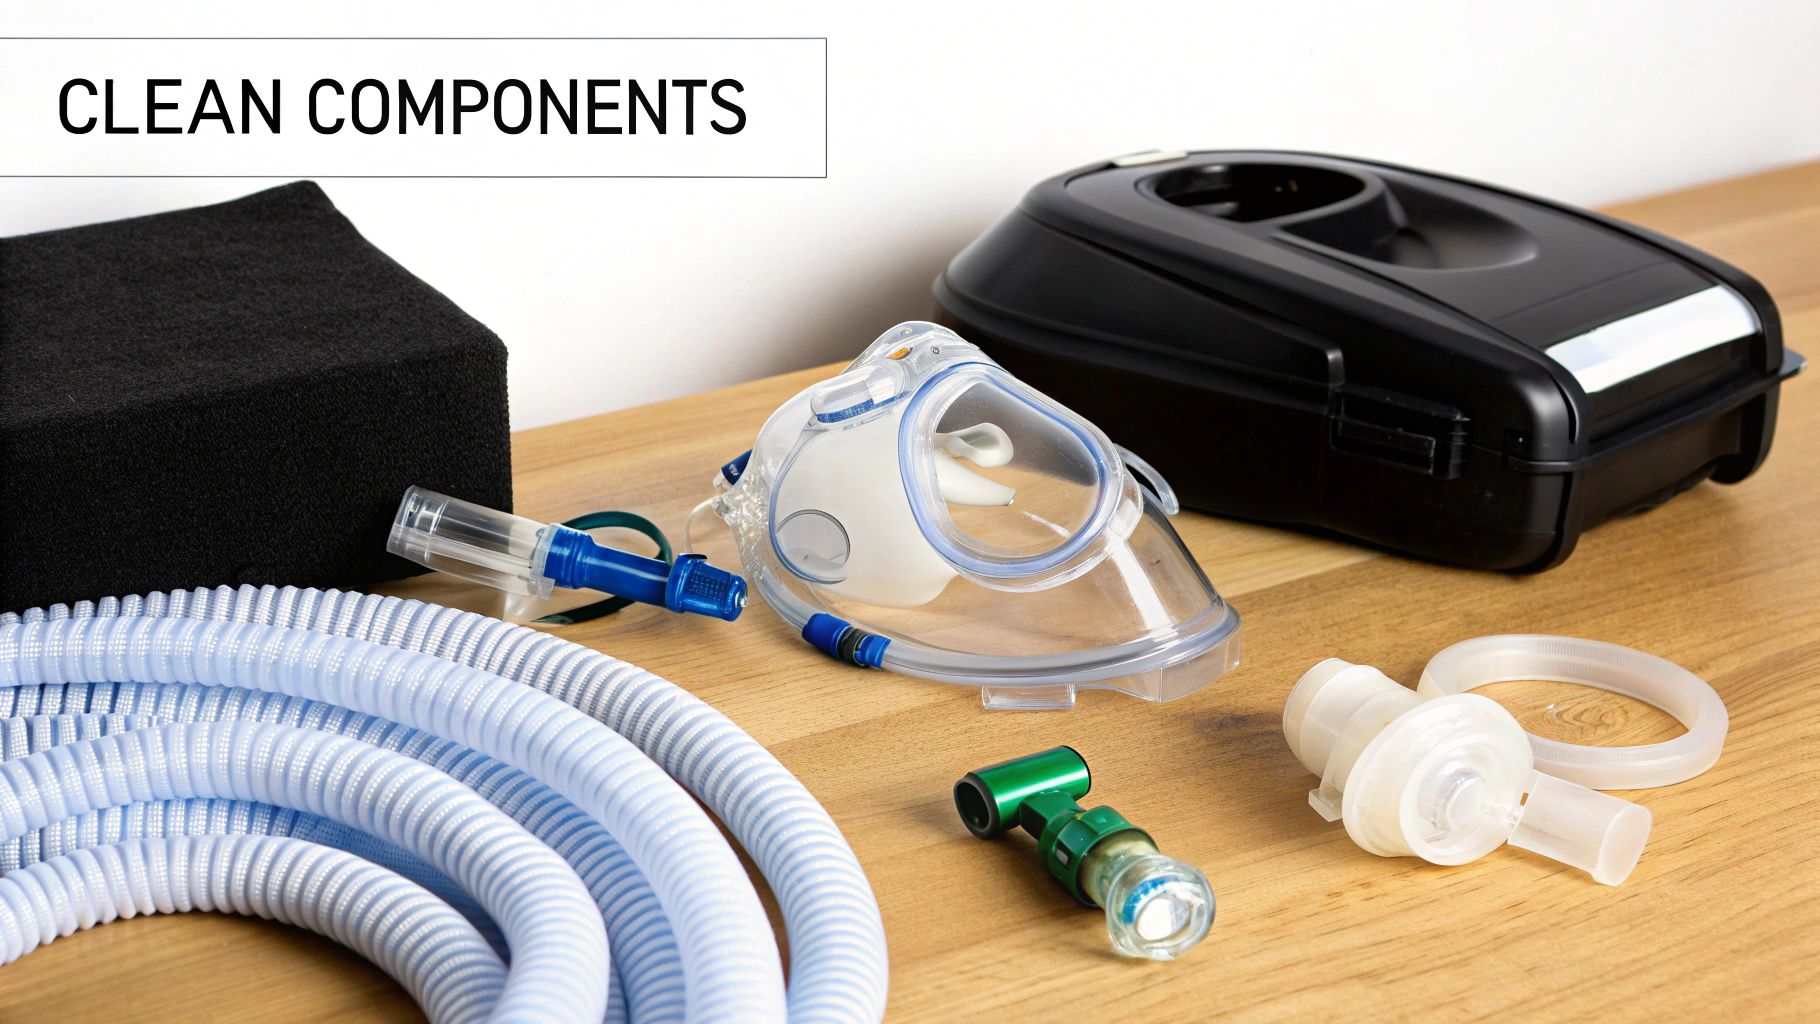
Let's walk through how to care for each part, from what rests on your face to the machine's internal air filters.
The Mask Assembly
Your mask is actually three key parts working together: the cushion, the frame, and the headgear. The cushion that touches your skin needs a quick daily wipe to get rid of facial oils, but the whole assembly benefits from a proper wash once a week.
- The Cushion and Frame: Take the mask apart and let these pieces soak in a basin of warm, soapy water. Use your fingers to gently rub away any residue. For those little nooks and crannies in the frame, a soft-bristle brush works wonders.
- The Headgear: The fabric straps are a bit different. They don't need to be washed as often as the silicone and plastic parts. A good hand washing every two weeks is usually plenty, unless they start looking a little grimy. Just swish them in the same soapy water and hang them up to air dry.
The Humidifier Water Chamber
If there’s one spot that can cause trouble, it’s the humidifier chamber. It's a prime target for mineral buildup and germs if you're not careful. This is why one rule is an absolute must: always use distilled water.
Tap water is full of minerals that leave behind a crusty white scale as the water evaporates. Not only is this stuff a pain to scrub off, but it can eventually damage the heating plate of your humidifier. Every morning, dump out any leftover water, give the chamber a quick rinse with fresh distilled water, and let it air dry completely (but keep it out of direct sunlight). A weekly bath in your soapy water solution will keep it in perfect condition.
The CPAP Tubing
That long hose is an ideal spot for moisture to get trapped, which can quickly lead to mildew if you're not vigilant. A deep clean once a week is non-negotiable here.
Disconnect the hose and dunk the whole thing in your soapy water bath. I highly recommend getting a long, flexible brush made specifically for CPAP tubing; it’s the best way to really scrub the inside walls. After a good scrub, run clean water through it until it's completely rinsed. Now for the most important part: drying. Drape the hose over a shower rod or towel rack so both ends are pointing down. This lets every last drop of moisture drain out. The tube must be 100% dry before you hook it back up.
Proper drying is just as important as proper washing. Reconnecting a damp tube can introduce moisture directly into your machine's internal components and create an environment where mold can grow.
Your Machine's Filters
Don’t forget the unsung heroes of your machine—the filters! They're the gatekeepers, blocking dust, pet dander, and other gunk from getting into your machine and your lungs. Most machines use one of two types.
- Disposable Filters: These are the thin, white, papery ones. They are not meant to be washed. Just check on it weekly and pop in a fresh one at least once a month. If it looks dirty or discolored before then, swap it out.
- Reusable Filters: These are the thicker, foam-like filters, usually gray or black. You can wash these. Give the filter a good rinse under warm running water once a week, gently squeeze out the excess, and let it air dry completely before putting it back in the machine.
Understanding what each part needs makes building a solid cleaning routine so much easier. If you notice any of your components are looking a bit worn out, you can explore replacement parts by browsing our selection of CPAP accessories.
Choosing The Right Cleaning Supplies
What you use to clean your CPAP equipment is just as important as how often you do it. Picking the wrong product can do more than just damage your mask or tubing—it can actually irritate your airways. The good news is that the best, safest, and most effective supplies are also the simplest.
Your Go-To Cleaning Kit
The gold standard for keeping your CPAP gear in top shape is a simple mix of mild, unscented liquid soap and distilled water. You really don't need to get fancy. A basic, gentle dish soap without any extra dyes or fragrances is perfect for cutting through the facial oils and gunk that build up on your mask and tubing.
When it comes to the water, using distilled water is non-negotiable, especially for your humidifier chamber. Tap water contains minerals that will leave behind a crusty, white buildup over time, which can eventually damage the heating element.
What Supplies You Should Absolutely Avoid
It can be tempting to grab whatever strong household cleaner you have under the sink, but please don't. Many of these products are way too harsh for the materials in your CPAP equipment and can be harmful to you.
Here’s a quick list of what to keep far away from your gear:
- Bleach and Ammonia: These are incredibly abrasive and will break down the silicone and plastics, causing them to become brittle and crack.
- Scented Soaps or Oils: Any lingering fragrances will leave behind a residue that you’ll end up inhaling all night. This can lead to some serious respiratory irritation.
- Alcohol or Harsh Solvents: These will dry out the flexible parts of your mask and tubing, dramatically shortening their lifespan.
The goal here is to clean, not to sterilize with harsh chemicals. A gentle wash is all you need to remove the physical grime like oils, dust, and skin cells that accumulate with nightly use.
The Role Of Wipes And Automated Sanitizers
While good old soap and water should be your foundation, a couple of other tools can make life easier. Specialty CPAP wipes are fantastic for a quick, daily wipe-down of your mask cushion. They're perfect for when you're traveling or just short on time, as they're designed to be gentle on the silicone while still removing oils effectively.
If you ever need help finding the right supplies, whether for your CPAP or for portable oxygen concentrators, our team is always ready to point you in the right direction. You can learn more about our St. Petersburg oxygen concentrator sales and rentals and see how we can help.
You've probably also seen automated sanitizing devices that use ozone or UV light. They've become quite popular, but it's crucial to understand what they do—and what they don't do. These machines are designed to kill germs, but they do not remove physical debris. Think of them as an extra step, not a replacement for actually washing your equipment.
The European CPAP cleaner market shows a big trend toward ozone sanitation, with many users running a 15-20 minute cycle weekly. However, experts stress that all parts must be completely dry first; damp conditions can lead to a 60% higher risk of mold growth.
Here at Affinity Home Medical Equipment, our respiratory professionals recommend a balanced approach: a daily rinse, a weekly soap-and-water wash, and an optional bi-weekly sanitizing cycle. This routine can achieve a 99.9% germ-kill rate without relying solely on the sanitizing machine. You can read more about CPAP cleaner market growth and sanitation trends to see how best practices are evolving.
Essential Long-Term Maintenance and Replacement Tips
Think of your CPAP machine like a car. You wouldn't just keep driving it without ever changing the oil or rotating the tires, right? Diligent cleaning is your daily and weekly upkeep, but long-term maintenance—actually replacing the parts that wear out—is what ensures your therapy keeps working effectively night after night.
Following a replacement schedule isn't about spending unnecessary money; it's about being proactive. It helps you prevent annoying issues like air leaks from a worn-out mask seal or reduced pressure from a cracked hose before they disrupt your sleep.
This is more than just performance; it’s about your health. The numbers are frankly a bit shocking. Studies have shown that a neglected CPAP can harbor up to 70 times more bacteria than a toilet seat. That's a sobering thought, and it’s why we’re seeing new innovations in home cleaning, with the household segment now making up 40.1% of the market. Learn more about the CPAP cleaner market findings.
Here at Affinity, our team knows the unique challenges of keeping equipment clean in Tampa Bay's humid climate. We can walk you through the best compatible cleaners for your specific machine, most of which are available for same-day pickup.
Your Replacement Timetable
Every manufacturer has a slightly different set of recommendations, but they all agree on one thing: parts don't last forever. Sticking to a general schedule is the best way to keep your therapy consistent and effective.
Here’s a good rule of thumb for when to swap out your supplies:
- Mask Cushions & Pillows: Plan on replacing these every 1 to 2 months. The soft silicone is constantly exposed to oils from your skin, which causes it to break down and lose its ability to create a good seal.
- Full CPAP Masks: The entire mask assembly should be replaced every 6 months.
- Tubing (Hose): Every 3 to 6 months is a good interval. Over time, tiny, invisible cracks can form, causing you to lose precious air pressure.
- Humidifier Chamber: Swap this out every 6 months. Mineral deposits can build up, and hairline cracks can develop that are impossible to fully clean.
- Reusable Filters: Even with weekly washing, they should be replaced every 6 months.
- Disposable Filters: Change these at least once a month. If you live in a dusty home or have pets, check it more often—if it looks dirty, change it.
Inspecting Your Gear for Wear and Tear
A calendar is great, but your own eyes are your best tool. Get in the habit of giving your equipment a quick once-over every time you clean it.
A visual check during your weekly deep clean is a great habit. Watch for yellowing or discoloration on clear silicone parts, a sign the material is breaking down. Feel for any stiffness or loss of flexibility in your mask cushion or tubing.
If a part looks worn out, don't wait for its scheduled replacement date. Go ahead and swap it out right away to avoid any lapse in your therapy. This is crucial even for short-term users; you can find more information in our guide on St. Petersburg medical equipment rentals.
Proper storage also makes a huge difference. Keep your machine and parts out of direct sunlight, which can quickly degrade the plastics and silicone. Find a clean, dry spot away from dust and curious pets. A little proactive care goes a long way in protecting your investment and ensuring you get a safe, effective night's sleep, every night.
Common Questions About CPAP Cleaning
Even after you've got a solid routine down, questions are bound to pop up. It's totally normal. Getting straight answers to common concerns is the best way to feel confident you're doing everything right.
Let's walk through a few of the questions we hear most often from our customers.
Can I Use Tap Water To Clean My CPAP Equipment?
For the weekly scrub-down of your mask and tubing, using tap water with a bit of mild soap is perfectly fine. It gets the job done.
But here's the one hard-and-fast rule: only use distilled water in your humidifier chamber. No exceptions.
Tap water contains minerals that, as the water heats up and evaporates, leave behind a chalky, crusty white scale. This stuff is a real pain to clean off and can eventually wreck your machine's heating element. I also recommend giving all your parts a final rinse with distilled water after washing—it’s a great little trick to prevent any mineral spots from forming as they dry.
What Is Causing That Smell From My CPAP Machine?
If you notice a musty or just plain funky odor, that's your nose telling you that bacteria or mold have moved in. This almost always points back to a cleaning issue or, more often than not, parts not being allowed to dry completely. The humidifier and the long, coiled tube are the prime spots for moisture to get trapped, so give them extra attention.
Sometimes, even after a deep clean, a smell can linger. That's usually a sign that a part is at the end of its life. An old filter, a well-used tube, or a mask cushion that's starting to break down can all trap odors. It’s also worth mentioning that brand-new gear can have a slight "new plastic" smell, but that should vanish after the first wash.
If you're ever in doubt, trust your nose. A persistent odd smell is a clear signal that something in your cleaning or maintenance routine needs adjustment.
How Should I Clean My CPAP When Traveling?
Keeping up with your cleaning on the road is easier than you might think. Just pack a small travel-sized bottle of your usual soap. I also find that CPAP-specific cleaning wipes are a lifesaver for quick, daily mask wipe-downs when you're away from home.
What about water? If you can't get your hands on distilled water for the humidifier, using bottled water for a night or two is okay in a pinch. Just make it a priority to switch back to distilled as soon as you can. And always, always let your parts air dry completely on a clean surface—a fresh towel in the hotel room works perfectly—before putting it all back together.
At Affinity Home Medical Equipment, we believe that clear guidance is the key to successful therapy. If you have more questions or need to refresh your supplies, our knowledgeable team is here to help. Explore our CPAP solutions and more at https://affinityhomemedicalequipment.com.
Share This Article

Written by : lori@netcodesign.com
Follow Us
Latest Articles

October 13, 2026

October 13, 2026

October 13, 2026
